This article is for administrators.
Steps to Request Remarketing Authorization from Candidates
- In Recruiting, click Admin and then click the Privacy tab.
- In the Candidate Remarketing - Applications section, click the radio button next to Request Authorization to Remarket on Applications.

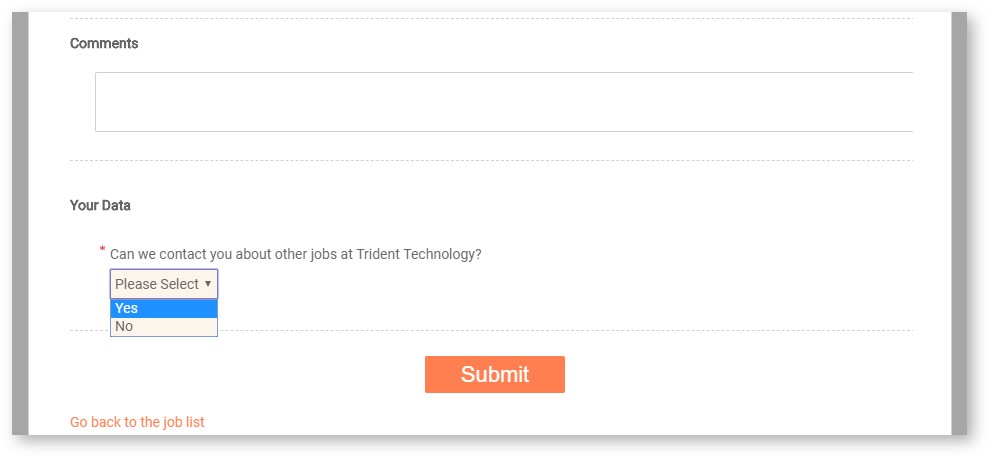
When this feature is enabled, an extra question is added to the end of all applications, as shown here:
Steps to Delete Candidate Data in Bulk
Important:
- When using this tool, the deletion is permanent and cannot be undone.
- To ensure relevant data is not lost, you cannot use this tool to remove data that is under one year old.
To delete candidate data in bulk:
- In Recruiting, click Admin and then click the Privacy tab.
- In the Bulk Candidate Deletion section, choose the parameters and the data you want to delete.
- Click Delete Candidates.
Note: It is important to regularly purge candidate information that exceeds a reasonable timeframe.

Steps to Manually Change a Candidate's Privacy Settings or Export Their Data
- In Recruiting, access a candidate's record and open the Candidate Info screen.
- In the Privacy Tools tab, Admins and Staffing Users can edit the candidate's opt-in/opt-out status for Do Not Contact and Candidate Remarketing.
Note: Certain laws might require companies to provide individuals with their personal information upon request. The Candidate Data Export includes all information related to a candidate, including all comments regardless of privacy settings.
For more information, see: Recruiting: Privacy Tools FAQ and Troubleshooting.

Updated: December 24th, 2025 5287 views 0 likes
*This content is for educational purposes only, is not intended to provide specific legal advice, and should not be used as a substitute for the legal advice of a qualified attorney or other professional. The information may not reflect the most current legal developments, may be changed without notice and is not guaranteed to be complete, correct, or up-to-date.