This article is for administrators.
Overview
You can create Custom Stages and Statuses to use in your custom hiring processes. For more information, refer to Custom Hiring Processes.
Custom stages and statuses let you change your hiring processes to reflect key events in your organization's hiring workflows.
Notes:
-
Only the default stages are tied to key features, such as interview scheduling, background checks, and offer letters.
- Turning off a default stage in a hiring process can prevent your team from using key features when managing candidates.
- Custom stages and statuses only allow you to post a comment.
Create a custom stage
As an administrator or staffing user, you can create, edit, and manage your hiring processes in Paycor. You can create a custom stage when you create or update a hiring process.
- Go to People > Hiring > Applicant Tracking.

- At the top, select Admin, then select Job Management. The Job Management screen opens and defaults to Hiring Processes > Create a New Process.

- On the left, find the Enabled Hiring Process you want to edit and go to the Hiring Stages and Statuses section.
- Select the blue plus sign (+) icon between each Default Stage in the Hiring Process Form. The Add a New Stage & Status section opens.

- Select the blue plus sign (+) icon next to the Stage Name field. The Add Custom Stage window opens.
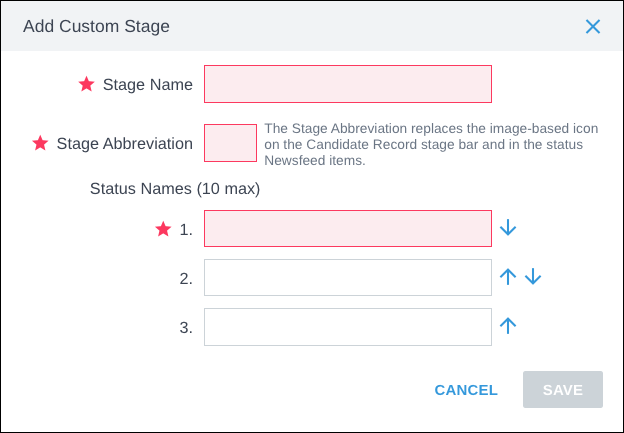
- Enter a Stage Name, Stage Abbreviation, and at least one Status Name.
- To reorder Custom Statuses, use the arrows to the right of each Status Name field.

- Select Save in the Add Custom Stage window. The Custom Stage is added to the current Hiring Process in the location you chose.
- At the top of the Hiring Process Form, select Save. The new Custom Stage is added to your organization's Stage Library.
Add an existing custom stage to a hiring process
You can add an existing Custom Stage when you create or update a Hiring Process.
- Go to People > Hiring > Applicant Tracking.
- At the top, select Admin, then select Job Management.
- Select Create a New Process or select the existing Hiring Process you want to update.
- Select the blue plus sign (+) icon between each Default Stage in the Hiring Process Form.
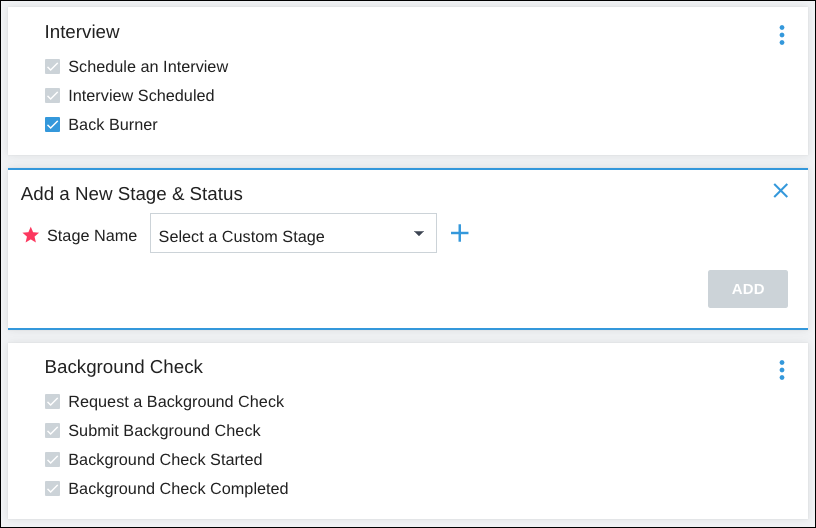
- In the Stage Name field, select the appropriate Custom Stage. The Custom Stage is added to the current Hiring Process in the location you chose.
- At the top of the Hiring Process Form, select Save to confirm your changes.
Remove a custom stage
- Go to People > Hiring > Applicant Tracking.
- Select the blue plus sign (+) icon between each default stage in the Hiring Process Form.
- On the Custom Stage Card you want to remove, select the 3-dots icon.
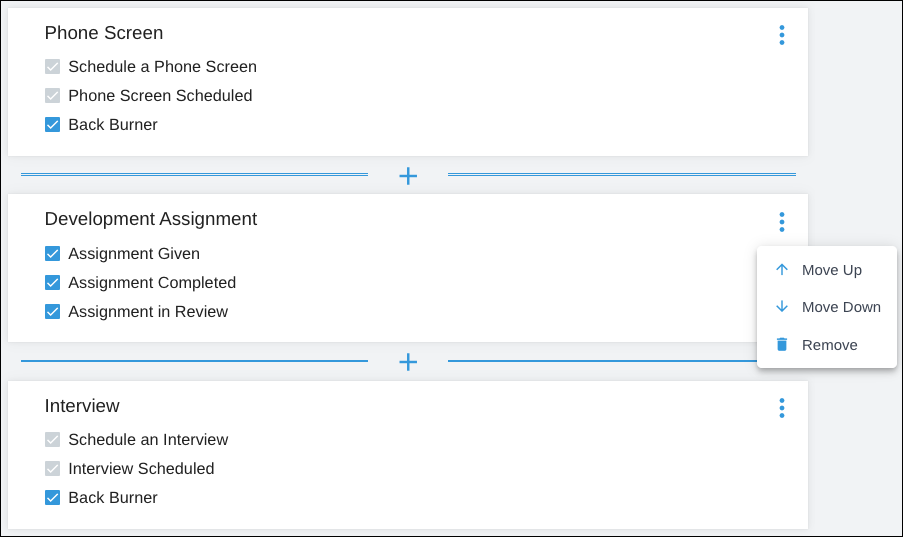
- Select Remove. The Custom Stage is removed from the current Hiring Process.
- At the top of the Hiring Process Form, select Save to confirm your changes.
Edit a custom stage
- On the Custom Stage that you want to edit, select the edit icon next to that Stage when viewing the Stage Library. The Edit Custom Stage popover displays.

- On this screen, you can modify the Stage Name, Stage Abbreviation, Status Names, and status order.
- To save your changes, check the acknowledgment box, then select Save:
- Changes made to the Custom Stage are immediately reflected in any Hiring Process that features the Custom Stage.
- Newly added Custom Statuses in the Custom Stage will be inactive by default in Hiring Processes that already feature the Custom Stage.

Access the stages library
- Go to People > Hiring > Applicant Tracking. The Active Jobs screen displays.
- At the top, select Admin and select Job Management. The Job Management screen opens and defaults to the Hiring Processes tab > Create a New Process.
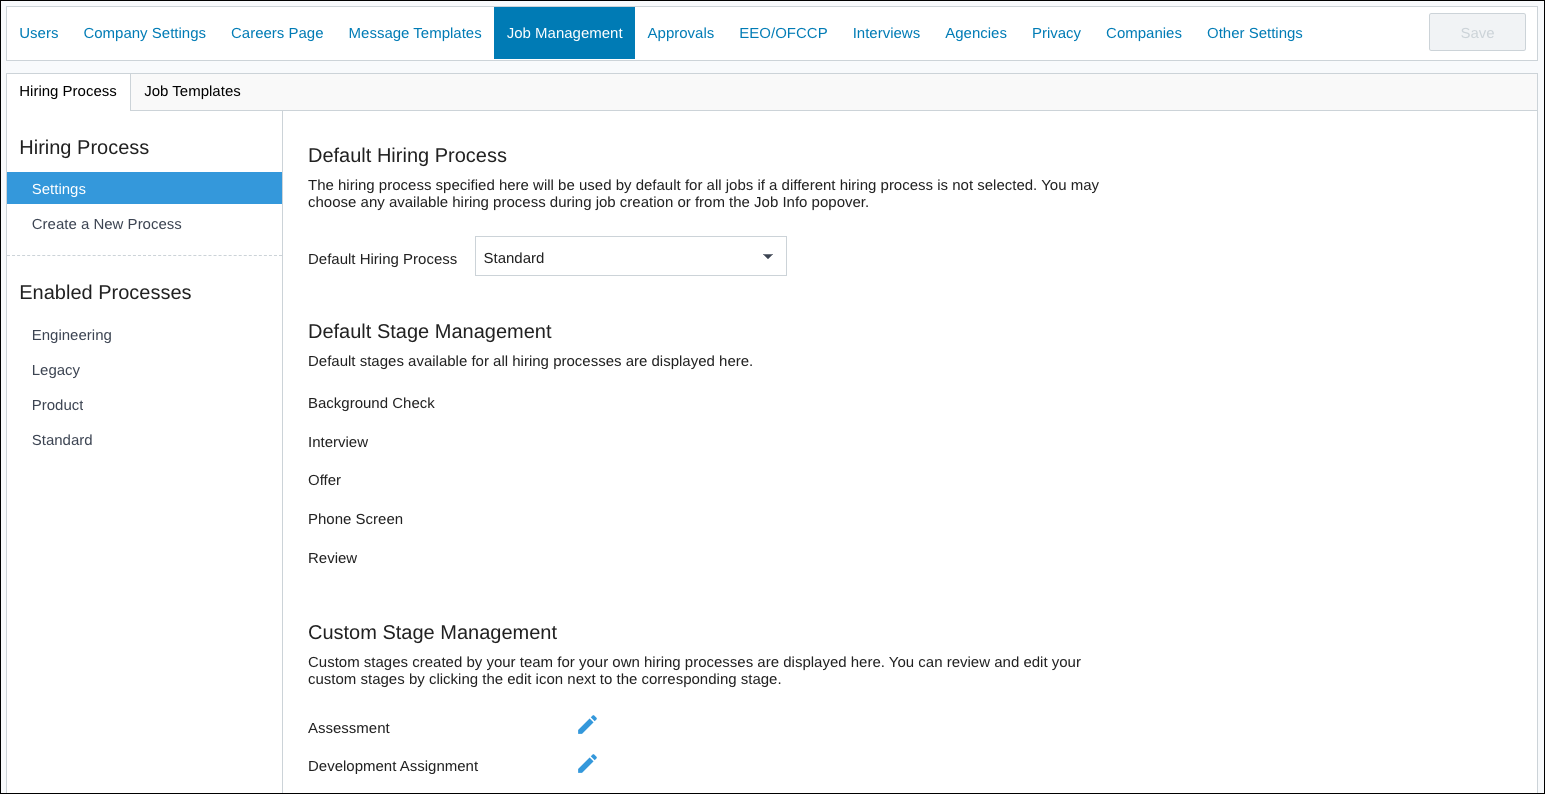
- On the left, select Settings, and a list of the available Default Stages displays, including any Custom Stages created by your team.
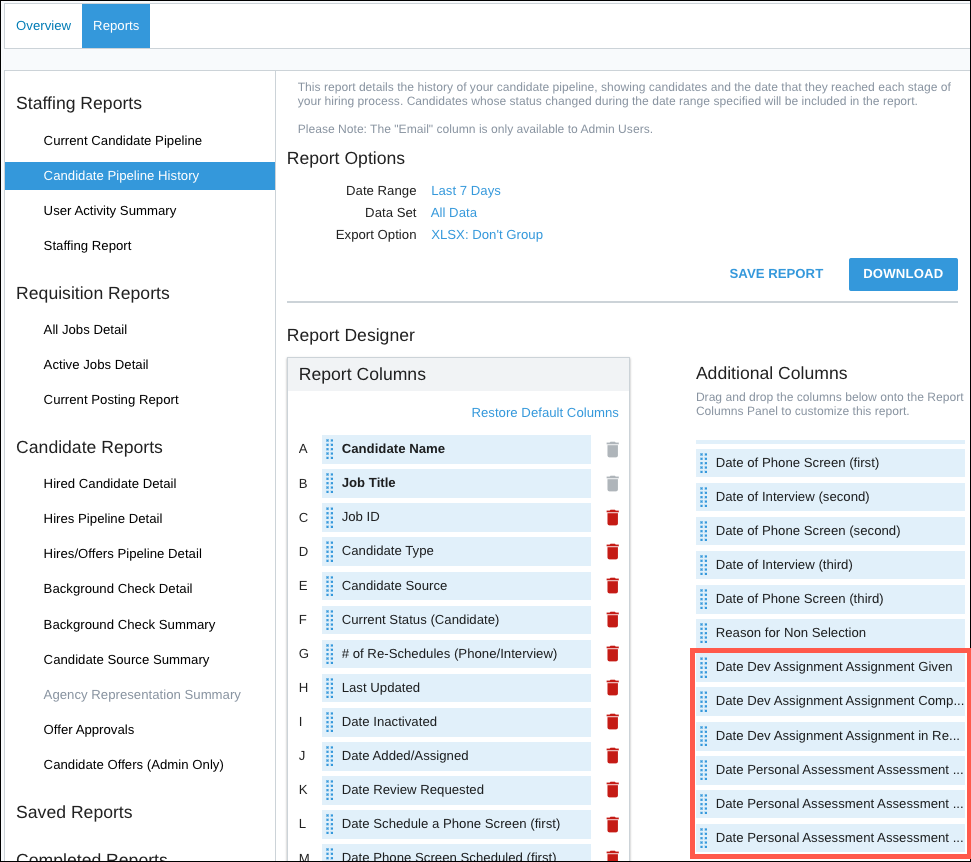
View reporting for custom stages and statuses
All report templates that include job information now feature the Hiring Process column as an Additional Column you can include when running your reports.
- Go to People > Hiring > Applicant Tracking. The Active Jobs screen opens.
- At the top, select Admin and select Analytics. The Analytics screen displays and defaults to the Overview tab.
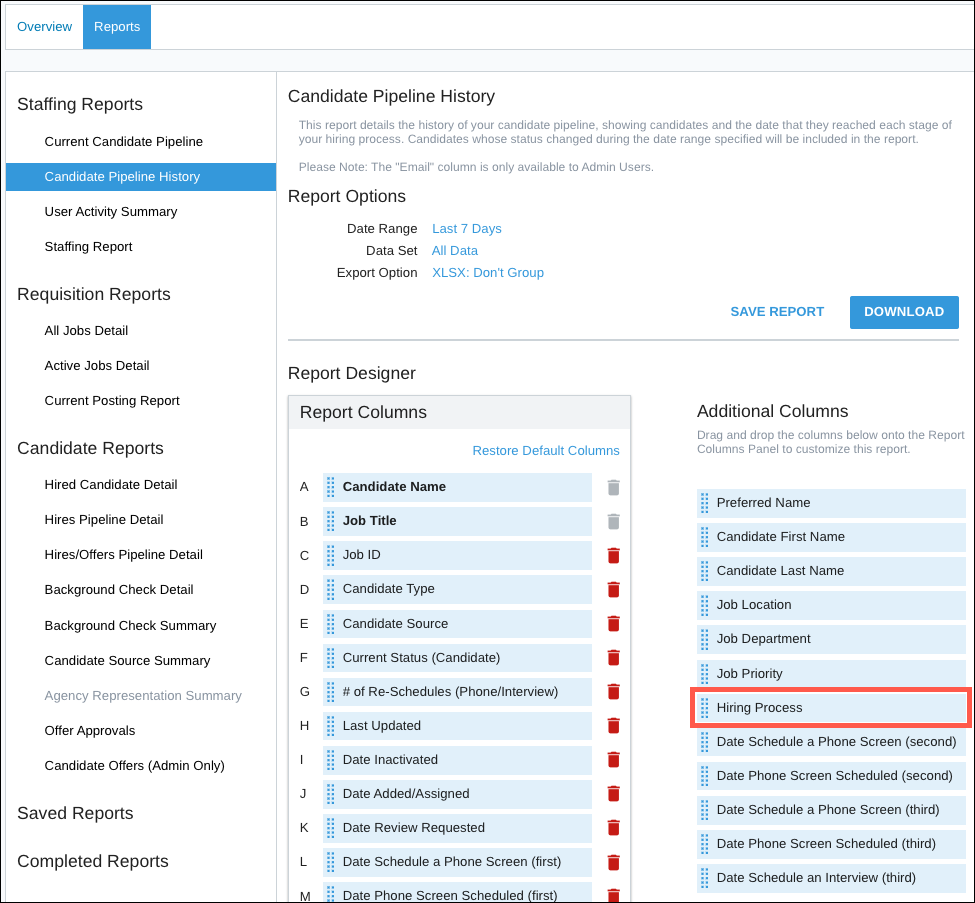
- Select the Reports tab. Some report templates are updated to include Additional Columns for each Custom Status your team adds to your company account.
- The current list of updated report templates includes: Candidate Pipeline History, Hires Pipeline Detail, Hires/Offers Pipeline Detail, and Background Check Detail.
Updated: May 11th, 2026 7746 views 0 likes
*This content is for educational purposes only, is not intended to provide specific legal advice, and should not be used as a substitute for the legal advice of a qualified attorney or other professional. The information may not reflect the most current legal developments, may be changed without notice and is not guaranteed to be complete, correct, or up-to-date.