The article is for administrators.
Overview
Administrators can fully customize Budget Info fields for all job posts in your company. These fields can be used to track requisition-related information in Recruiting and converted for reporting purposes.
When you create a new job, the Budget fields described in this article carry over into job approvals in Recruiting.
Note: Custom fields you create in Recruiting do not transfer to the employee's profile when they are onboarded. This is because new employee profiles are created in Paycor, not Recruiting. For more information, see How Do I Transfer a Hired Employee from Recruiting to Paycor and Start Onboarding Them?
Steps to Customize Budget Fields
- Log in and go to People > Hiring> Applicant Tracking. The Recruiting dashboard appears.


- On the top click Admin and select Company Settings. The Company Settings screen appears.
- On the left, click Budget Fields. The Budget Fields tab appears.

- Click and drag Create a Custom Field to the location you want the new field to appear.
- Select a Field Type - Recruiting has these options:
- Text Entry / Short
- Text Entry / Long
- Paragraph Text
- Checkboxes Drop Down List
- Date Field
- Yes/No
- Scale
- Low to High
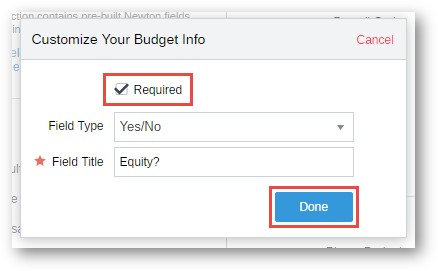
- Complete the Field Title field.
Note: Choose the name of the field carefully. It cannot be edited later without completely deleting the field and all associated information.
- You can also mark the field as Required, and then click Done.
- When you finish, click Save.

How Do I Make Changes Later?
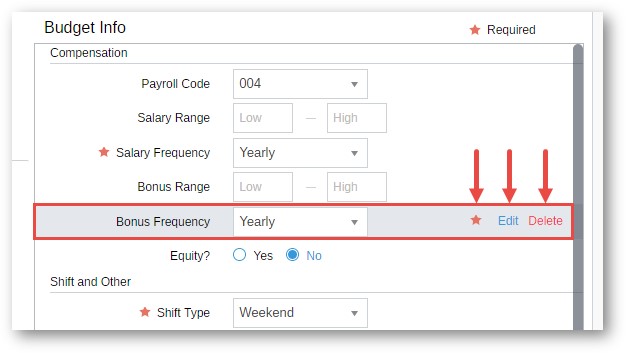
- Follow Steps 1 through 4 to access the Budget Fields.
- Move your cursor over the field. Click the Red star to swap between Required and Optional.
- You can also edit certain fields (such as drop-down lists) or delete the field to remove it from Budget Info.
Notes:
- The Field Title cannot be edited after it's created.
- Deleting a custom field removes all associated information.
How Do I Report Job Budget Information?
Go to Recruiting Analytics to report Job Budget information. To include the custom columns, select them and then click Add.
Alternatively, click and drag the columns over to the Report Columns Panel.

Updated: December 24th, 2025 5997 views 0 likes
*This content is for educational purposes only, is not intended to provide specific legal advice, and should not be used as a substitute for the legal advice of a qualified attorney or other professional. The information may not reflect the most current legal developments, may be changed without notice and is not guaranteed to be complete, correct, or up-to-date.